Here are some informations to live stream your Xiaomi Mijia Mi Sphere or Madventure360 camera on YouTube, Facebook and Periscope. I won’t say it is perfect, but it works on some conditions. This tutorial is for Windows 10, although it can work on a different OS but you will need to adapt yourself.
Though I tried to make it understandable to everyone, you will need coffee or tea if you are not familiar with typing cryptic commands.
Prerequites
Before starting you will need :
- Before going further one condition is absolutely required for this hack to work: you will need two connections at same time, a wireless connection to get your camera stream input and a wired connection to your router to stream the ouput to Youtube. If your PC cannot meet this condition, this tutorial already ended for you.
- Download the package xiaomi-misphere-live.zip and unzip it on a working folder. Though you can type all the commands by hand, it will allow you to simply launch batches. 📁 indicates the location of files
- Download and install ffmpeg a way it is available on your path.
- I provide a compiled version of software into xiaomi-misphere-live.zip but if you want to work with source, install Windows Linux Subsystem.
Connect to Xiaomi Sphere
The first step is to connect your PC to the camera. Be aware the camera IP address is fixed with 192.168.42.1 mask 255.255.255.0 thus if your network already use the same address space 192.168.42.x you won’t be able to connect and you will need to change your router address.
Power on the camera, enable WIFI on your PC, browse through WIFI connections and search for a SSID starting with MIXJ- it is your Xiaomi Mijia Mi Sphere Camera. The default WIFI password: 12345678.
Once you are connected you can check the live stream of the camera is available.
Either :
- By using VLC and opening a network source menu Media / Open Network Stream (Ctrl+N) type this address
rtsp://192.168.42.1:554/live
- By typing this windows command
📁 [live/live-show.cmd]
ffplay -i rtsp://192.168.42.1:554/live
Stitch the camera in real-time
You will probably notice the live stream of camera is the dual fish eyes and is not the full resolution of camera but is limited to 720p/60FPS.
Before streaming to YouTube one needs to stitch the dual fish eyes into equirectangular projection in real-time. As you already stitch video with Xiaomi Application you know this operation consumes a lot of CPU power. To achieve the same in real-time we will use a trick, the remap function of ffmpeg.
The principle of ffmpeg mapping is to use original pixels from video source and map them at specific positions into video output. Using remap we can emulate a equirectangular projection using a pre-calculated map at a much faster rate.
The build-in map filter of ffmpeg needs two files to map each pixel from video source to target video. I provide four sets to match different situation :
📁 [maps]
- map-misphere-6912×3456-x.pgm, map-misphere-6912×3456-y.pgm for stitching camera pictures files,
- map-misphere-3456×1728-x.pgm, map-misphere-3456×1728-y.pgm for stitching camera video files,
- map-misphere-1440×720-x.pgm, map-misphere-1440×720-y.pgm for stitching camera live stream for facebook and periscope
- map-misphere-1280×720-x.pgm, map-misphere-1280×720-y.pgm for stitching camera live stream for youtube.
If you want to create your own maps you will find more informations at the end of this post but is not needed at this point.
Check the real-time stitching
Now you are ready to check the real-time stitching of the Xiaomi Mi Sphere camera. Open a windows command and stitch live stream with a first command.
For each scripts I give two options depending on your Graphic Card. If you own a NVidia Graphic Card then you can use the Nvidia NVENC. It is a feature that performs video encoding on your graphic card, offloading this compute-intensive task from the CPU. On other case you will use the more generic x264 encoder of ffmpeg. If you are not sure try first with NVENC and if is failing use the generic x264 encoder.
📁 For NVENC: [live/live-realtime-stitch-encode-nvenc.cmd]
📁 For x264: [live/live-realtime-stitch-encode-x264.cmd]
This will create a stream on port 1234.
Open a second windows and type this command:
📁 [live/live-realtime-stitch-show.cmd]
You should see now the equirectangular projection of your camera into ffplay windows in 1440×720
Streaming Live
Some Requirements
We will need special settings:
Schedule an event
You can live stream 360° video in Youtube only into events, no idea why.
Scale the video to 1280×720
The 720p equirectangular format should be 1440×720 but Youtube is waiting for a non 360 video standard format of 1280×720 (which is odd but I guess this point can evolve in future). If you don’t scale the video to that format you will get this warning message on your YouTube Live Dashboard : Please check the video resolution. The current resolution is 1440×720, which is not optimal.
Add a sound
The live stream of your camera has no sound but Youtube is waiting for the video to have sound. If we stream the Xiami Mi Sphere stream directly to Youtube it won’t be accepted, but this time no warning message will help you. You will see your stream going up and after a few seconds going down again without any explanation. Took me time to figure out the cause of issue.
Depends if you want to stream in Youtube or Facebook prepare your stream according.
Prepare your Youtube Live Stream
Go to Youtube Creator Studio, on Live Streaming, select Events, click on Schedule a new event.
Into Basic information enter a Title is required, you will probably want to make it private for the first test and select Private then select Custom (more encoding options).
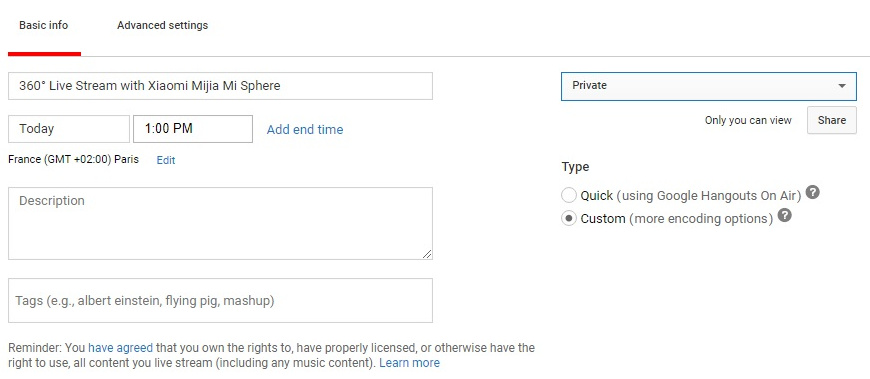
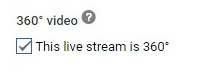
Select Advanced Settings and be sure to check the option This live stream is 360°
Click on button Create Event
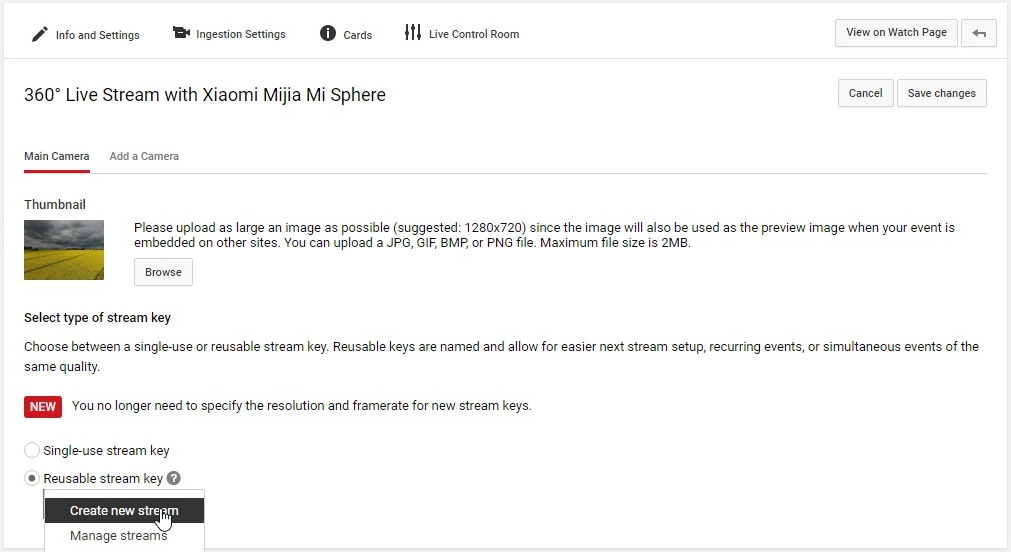
On Ingestion Settings page.
Select Reusable stream key
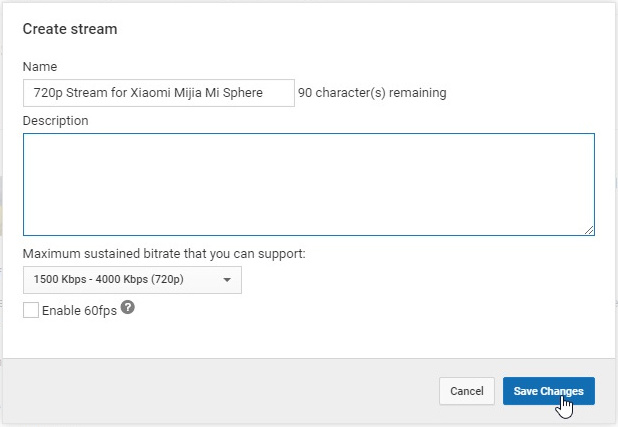
Click on Create a new stream
Select the speed compatible with your upload bandwidth. If you are not sure of your network capacity you can check it on Google Speed Test
Chose the option according to the result. Optimal speed is 1500 Kbs – 4000 Kbs (720p)
Click on Save Changes
On Ingestion Settings page.
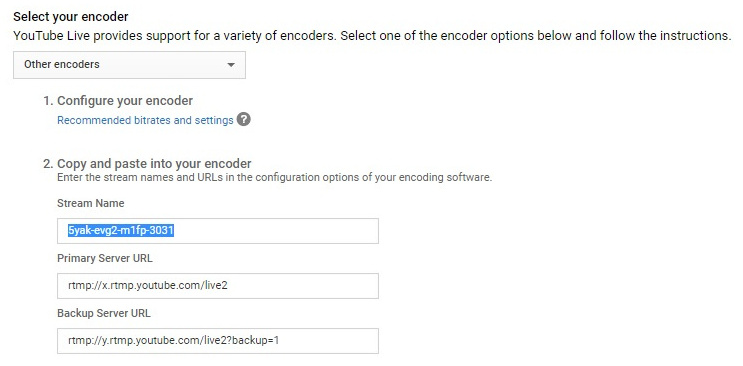
Click on Select an encoder and select other encoders
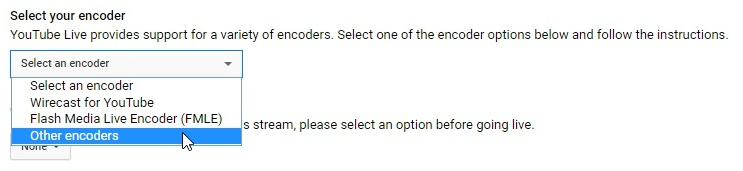
Youtube should give you a key something like “5yak-evg2-m1fp-3031”, write down that key you will need later to modify the streaming batch.
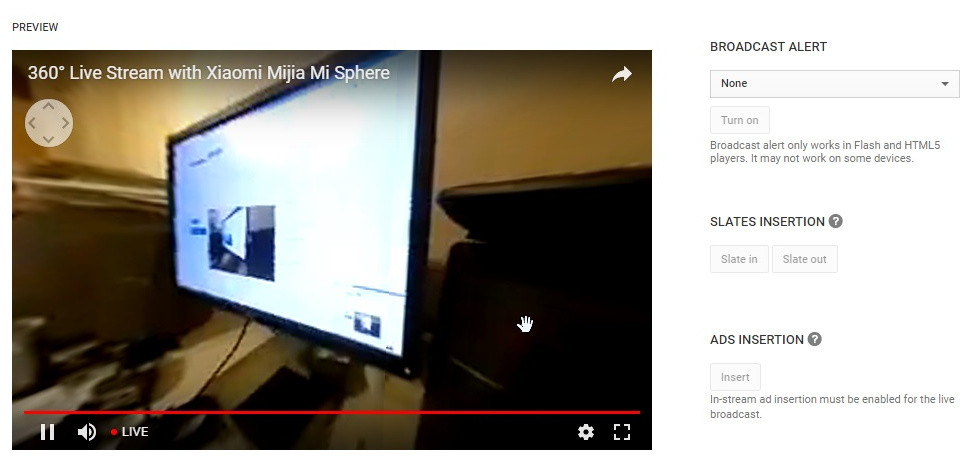
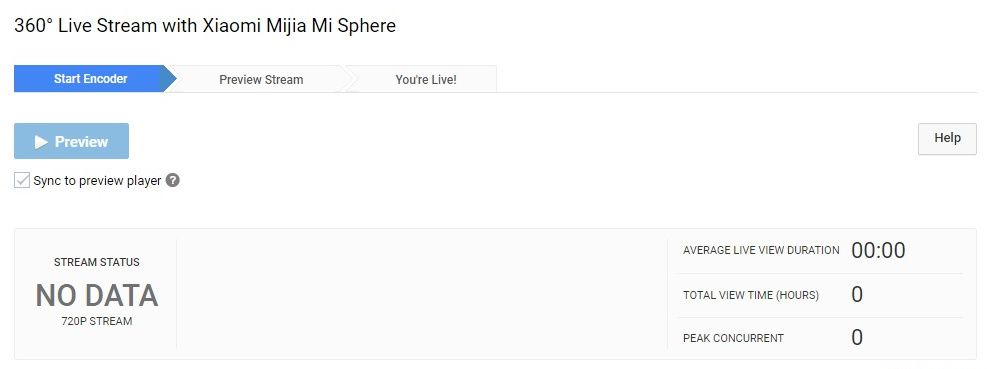
Click on Live Control Room
Your Youtube Stream is ready to receive video stream.
Prepare your Facebook Live Stream
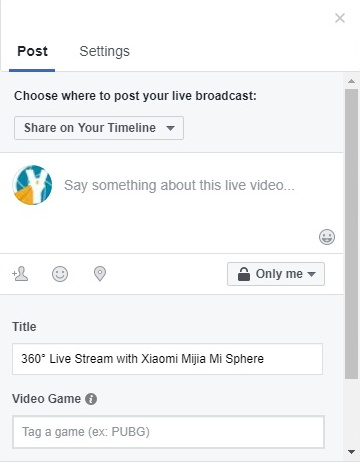
Go to Facebook Live. Click on Create Live Stream button.
Into Post set the title of your Live Stream, you will probably want to make it private for the first test and select Only me.
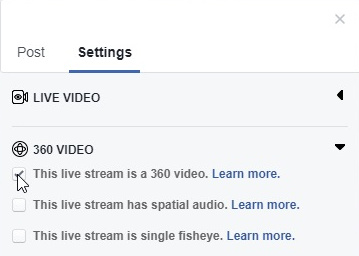
Into Settings click on 360 Video and enable This live stream is a 360 video.
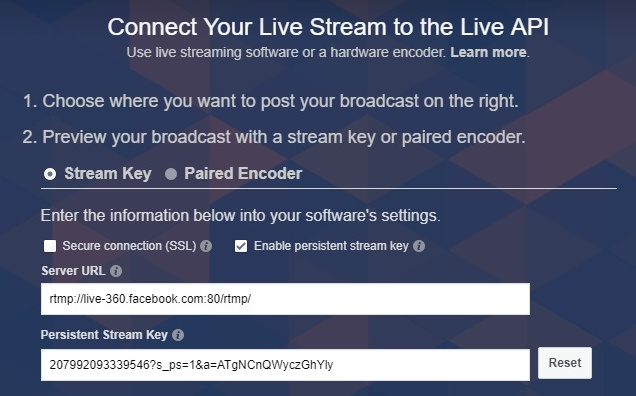
You should see the screen Connect Your Live Stream to the Live API now.
Check Enable persistent stream key
Facebook should give you a key something like “207992093339546?s_ps=1&a=ATgNCnQWyczGhYly”, write down that key you will need later to modify the streaming batch.
Prepare your Periscope Live Stream
Go to the Producer page
Click on create a new source
Select Source 360
Periscope should give you a key something like a server url and “skzvf4az6w25”, write down that key you will need later to modify the streaming batch.
Modify the streaming batch
Use a text editor and modify the batch corresponding to your target (Youtube or Facebook) and your GPU (NVENC or x264)
- Adjust the bitrate according to your network by modifying BITRATE variable
- If you have trouble to stream you can lower both FPS and BITRATE variables
- Check the STREAM_URL, You will need to adjust it for periscope depending of your region
- Set your personal stream key by modifying STREAM_KEY variable.
⚠ for Facebook modify the key given by facebook replacing & with ^& like this 207992093339546?s_ps=1&a=ATgNCnQWyczGhYly is becoming 207992093339546?s_ps=1^&a=ATgNCnQWyczGhYly
📁 [live/live-stream-(youtube/facebook)-(nvenc/x264).cmd]
SET FPS=30
SET BITRATE=1500K
SET STREAM_URL=
rtmp://a.rtmp.youtube.com/live2 (for Youtube)
rtmp://live-360.facebook.com:80/rtmp (for Facebook)
rtmp://de.pscp.tv:80/x (for Periscope)
SET /a GOP=2*FPS
h264_nvenc (for NVENC)
libx264 (for x264)
Some comments if you wonder about cryptic options
- -i rtsp://192.168.42.1:554/live is the xiaomi sphere live stream address
- -i ../maps/map-misphere-720-x.pgm -i ../maps/map-misphere-720-y.pgm -filter_complex “format=yuv420p,remap” performs the real-time stitching using ffmpeg remap preserving the color encoding
- -c:v libx264/h264_nvenc -preset medium -deinterlace -b:v %BITRATE% -r %FPS% -g %GOP% -bufsize 5000k encodes the video youtube accept only deinterlace video
- -g GOP Group of Pictures length also known as Keyframe Interval is the double of the FPS wich means a full frame is encoded every 2 sec
- -f lavfi -ianullsrc -c:a aac encodes audio adding a null sound to the video, youtube is waiting for sound into the stream
- -f flv “%STREAM_URL%/%STREAM_KEY%” The youtube rtmp stream entry point
If you followed me until this point, launch the command and you should be in live with a 360° stream in youtube, facebook or periscope and yep is 360° !
Appendice: Working with ffmpeg maps
This chapter give extended information if you want to create your own maps.
Compile the projection tool
We will use dualfisheye2equirectangular software developped by raboof to convert ‘dual-fisheye’ 360 image material to equirectangular.
You can compile the projection program typing this command on Windows Linux Subsystem, or skip this part if you trust the .exe I’m sharing.
cc -o projection projection.c -lm
This will create projection file.
Create stitching maps for Xiaomi Mi Sphere
Here are the projection parameters :
-x [xmap file] -y [ymap file] -r [input height] -c [input width] -h [output height] -w [output width] -m [mode] -b [crop]
I found those settings to work with Xiaomi Mijia Mi Sphere
📁 [maps/maps-create]
# http://yaiol.com/2018/05/01/xiaomi-sphere-live-stream/
# for pictures
../dualfisheye2equirectangular/projection -x map-misphere-6912×3456-x.pgm -y map-misphere-6912×3456-y.pgm -h 3456 -w 6912 -r 3456 -c 6912 -b 150 -m samsung_gear_360
# for video 3.5K
../dualfisheye2equirectangular/projection -x map-misphere-3456×1728-x.pgm -y map-misphere-3456×1728-y.pgm -h 1728 -w 3456 -r 1728 -c 3456 -b 75 -m samsung_gear_360
# for live video to facebook and periscope (720p)
../dualfisheye2equirectangular/projection -x map-misphere-1440×720-x.pgm -y map-misphere-1440×720-y.pgm -h 720 -w 1440 -r 720 -c 1440 -b 30 -m samsung_gear_360
# for live video to youtube (720p)
../dualfisheye2equirectangular/projection -x map-misphere-1280×720-x.pgm -y map-misphere-1280×720-y.pgm -h 720 -w 1440 -r 720 -c 1280 -b 30 -m samsung_gear_360
Still using Windows Linux Subsystem, type this command.
./maps-create
How to create your own settings
If the files I share don’t work well with your camera you can create your own settings. First create a video file capturing live stream using ffmpeg
📁 For NVENC: [maps/misphere-capture-nvenc.cmd]
📁 For x264: [maps/misphere-capture-x264.cmd]
Stop it after a while with Ctrl+C you will end with a video capture of the camera misphere-live.ts. Open that video file with VLC and take a snapshot Menu Video/Take Snapshot. Rename the picture misphere-live.jpg and use that picture to make test of stitching
Modify the value of the -b (crop) parameter of projection into the batch file maps-create/create-maps and type this command to create equirectangular projection.
📁 [maps/misphere-stitch.cmd]
Check the picture with four favorite 360 viewer. Once you are satisfied with the result you can go to next step.
Hope you enjoyed this tutorial, any comment is welcome.
Useful links
For more information about Xiaomi Mijia Mi Sphere visit the Ultimate Resource Page of Mic Ty.
Great work Dude!! Will do this asap.
This looks great. Just what I need to use this cam as a 360 degrees CCTV cam p on an existing pole above my house while the camera is tethered to a USB for power.
One question though: could the ffmpeg mapping function be used to create tinyplanet type images? Do you have any experience with this?
Hi Cedlee, I haven’t found a tool to create map to stream a tiny planet on live with ffmeg. Though theorically must be possible.
Have in mind also having the Mi Sphere connected through wifi makes the camera heat quite a lot, I wouldn’t advice to have it connected 24/7 this way.
hi, do you know what extension does said ip (rtsp://192.168.42.1:554/live) export?, i’m trying to use it on java/opencv and it doesnt work, doesn’t it have a mp4/img type?
example: rtsp://192.168.42.1:554/image.jpg or /video.mp4
Thanks!
The stream address is rtsp://192.168.42.1:554/live no extension, you cannot change it.
The stitch mapping is not working for my Xiaomi Mijia 360. The camera video is played (unstiched)in the top left quarter, the rest of the video picture is green.